
* If you click a link on this page and make a purchase, we may receive a small commission at no extra cost to you. Learn more.
The title describes itself. Framing nailers are the number one nailers used for framing wood in heavy construction jobs and buildings. This type of nail gun has other uses that don’t stop at framing wood. It can be used for wood siding or sheathing, fence building, and carpentry work.
This variety of its uses is because it can work with nails up to 3-1/2, and these nails are used for heavy-duty objects such as building decks and homes.
The main advantage of the framing nailer is that it does all the work a hammer can do but with higher quality results. It doesn’t take much time or effort.
So, knowing how to use a framing nailer can come in handy one day. It is a privilege that will help when you are redecorating or simply taking up crafting or carpentry.
Follow these steps to know your way around a framing nailer as a pro.
READ NEXT:
Table of Contents
Step 1: Load the Nail Strip
Loading the gun means filling up its magazine. The magazine is where the nail strips are placed. So, slide the nail strip into the nailer’s magazine and close it once the nails are securely placed.
Step 2: Select your Firing Mechanism
There are two types of firing mechanisms that you can use:
First: The Single Fire Trigger
The single-fire trigger is the basic triggering method. By this method, the user simply places the nailer at the desired angle. Then, he pulls the trigger. This method gives more control and stability when using the trigger.
Second: The Bump Trigger
This method is a bit different. When using the bump trigger method, you have to compress the nozzle of the gun against the wooden workpiece. Then, you can fire the nailer. Even though it is less accurate than the single fire trigger method, it is faster.
Tip: you can use a combination of both methods.
In the combination of both methods, four sub-types of triggers are created.
- Single Sequential Trigger: fires when you remove and squeeze the safety contact as well as activate the controls.
- Full Sequential Trigger: similar to the single sequential trigger, but without the safety contact. It fires when you activate the controls.
- Contact Trigger: fires when the trigger and the safety contact are both activated.
- Single Actuation Trigger: similar to contact trigger, but the trigger is released first; then the safety contact is compressed consequently.
READ NEXT:
Step 3: Select your Nailing Method
There are two types of nailing methods; nailing and toe-nailing.
1. Through Nailing
The Through nailing method is a basic and simple way to use the nailer, in which the framing nailer is positioned at a perpendicular 90-degrees angle to the surface of the workpiece, ready to fire the nails.
2. Toe-nailing
The toe-nailing is like the through nailing. However, they are different in the angle at which the firing is done. The toe-nailing method of firing is done at an inclined angle of 45-degrees. This inclination allows you to use the framing nailer between two pieces of wood.
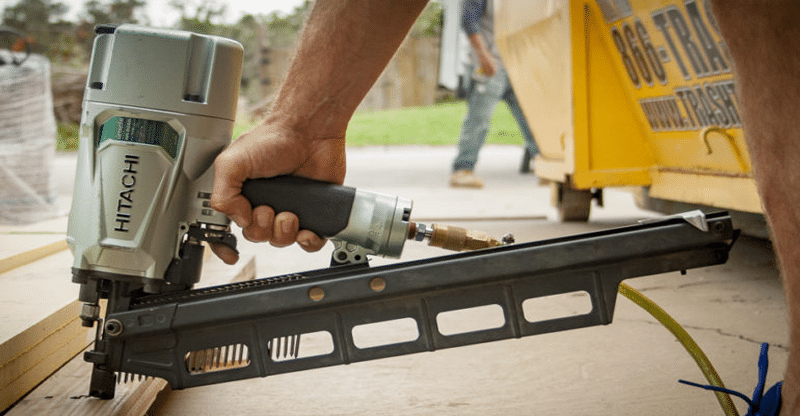
Step 4: Work your Framing Nailer
By now, you have loaded your gun and have chosen the methods of firing and nailing. What’s left is positioning your gun against the workpiece at the chosen angle. Then, to hold the handle in a way that gives you access to the trigger while applying pressure to your nailer.
When you are ready to fire, remember to be safe. Don’t put your hands or body at the risk of being in the firing zone. Try to secure the trigger with your hands.
Finally, once you have shot your first nail, instantly release the trigger. Then, remove the gun from the surface to check the state of both the gun and the nail.
READ NEXT:
Step 5: Final Check
When firing the gun, try to follow the instructions closely because if you leave your hands on the gun, another nail can be fired and if you remove it too early, the nail won’t be settled in the surface fright due to insufficient pressure.
If you want another nail to be fired or your nail strip is finished, you have to disconnect the nailer from its source of pressure before reloading the magazine again.
However, there are some safety precautions that you should always follow while using electrical tools.
Safety Precautions:
- Wear protective eye goggles, ear covers, and hard hats.
- Direct your nail gun towards the workpiece and away from your body.
- Use the nail gun with your dominant hand.
- Never remove the nailer tip to increase the speed of work.
- Make sure you select an appropriate firing angle before pulling the trigger.
- You can either use a hammer first to position the nails in the targeted positions or press the safety of the gun against the wood or workpiece before triggering it.
- Ensure that you are working from a safe distance because the firing of nails can cause a splash of wood into sharp bits and these bits can be dangerous.
- Once you have finished your work, instantly disconnect the source of power, the air compressor.
- Put your finger away from the trigger unless you are ready to use the nail gun.
- Empty your nailer until you want to use it.
These precautions are essential to be able to effectively, professionally, and safely use the framing nailer. Framing nailers tend to have the highest percentages of causing injuries at work sites. Moreover, they work with air compressors. So, this kind of generated pressure can be dangerous for non-professionals. Take care.
After you have followed the above steps carefully, get ready to fire and nail!
READ NEXT:
- Best Roofing Nailer Guide
- Best Electric Brad Nailer Guide
- How Do Nail Guns Work
- What Degree Framing Nailer Is Best
- What are the Different Types of Nails Guns
- What Do You Use a Brad Nailer For
- What Size Finishing Nails For Baseboards
Final Thoughts
Framing nailers are used more with heavy constructions and building works. So, it is better for users to be prepared before using them. To know how the nailer works, the difficulties he can face, and how to overcome them.
The most significant thing about the framing nailers is that they are not complicated when using. You just need to understand and adapt to the type that will get your work done. Enjoy your nailer and stay safe!