
Did you know that there is more than one way to use a coping saw? When crafting, many people only think of the most common use: cutting out shapes.
However, this tool is also great for making intricate cuts and even engraving designs! In this blog post, we will discuss six ways that you can use a coping saw.
Table of Contents
Guide On How To Use A Coping Saw
1) Fix The Length Of Wood On The Vice.
Use a coping saw to outline shapes on the piece of wood and then use duct tape. This is great for delicate pieces with intricate details, like fretboards or headboards.
Use it as an engraving tool by carving into surfaces that are thicker than your fingers can reach such as tabletops or signs. You could also carve designs onto fences and gates!
Cut off unneeded areas from around bolts and screws so they fit snugly in holes drilled through other materials using a hole saw.
2) Drill A Hole In The Middle Of The Piece Of Wood.
Hold it up to your work surface and use a coping saw to cut around this hole, trimming off any excess bits from inside the shape.
You can also drill holes in corners that you want mitering with another material such as when building furniture or cabinets.
Use it for cutting out an empty space where two materials meet – like joining pieces of plywood together!
Create notches on window sills so they are easier to reach because they’re hard enough already? You could even make circular cuts which would create perfect circles within those notches!
3) Sketch Out The Required Angles Of The Cut.
This will allow you to make sure everything is aligned and ensure that all measurements are correct before moving on to using a coping saw!
You might find it easier to mark out where each line should be with pencil first or if you’re feeling confident about drawing lines in freehand then go for it.
When marking along edges, use a ruler as well as this will help keep things straight. It also helps prevent mistakes such as slipping off one side instead of staying on the opposite edge while trying to follow an edge carefully with a sharpening blade.
4) Detach The Blade From One End Of The Coping Saw.
Detach one end of the coping saw blade from the metal frame so that you can insert it into a vice.
Holding on to your blade with two hands, place its center-line at the point where it should be inserted and apply pressure by turning back and forth.
The idea is not to break off an overhanging part of either side but rather just enough for there to be room for sliding inwards without catching anything or getting caught up in any other way.
5) Insert The Blade.
Insert the blade into a vice at an angle and securely tighten it.
This is done to prevent any movement while cutting on it with sharpening blades or something similar.
It’s also important to ensure that the teeth are facing downwards so as not to damage them, which could lead to accidental slippage in use.
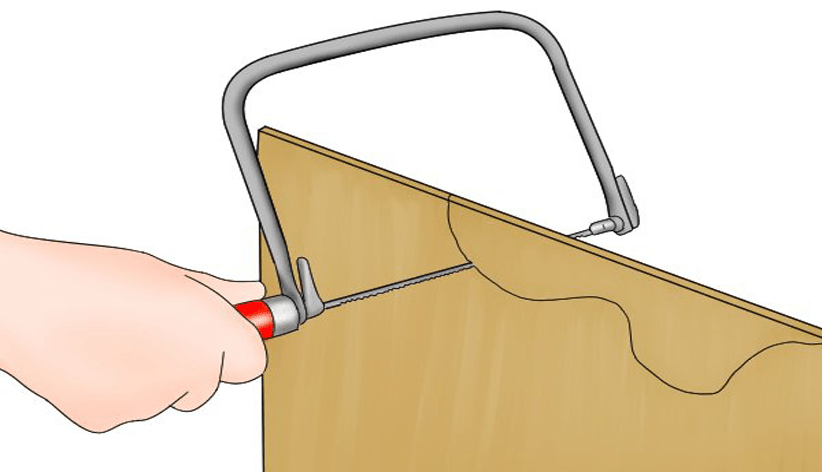
6) Guide The Blade Through The Curve.
Guide the blade through one of the curves and apply pressure as needed, with a sawing motion.
This can be done to get into tight corners or for when there’s not enough room for circular cuts, such as if you need to cut out some gunk from inside your gutters.
Push down on just one side of the spine so that it bends slightly then guide it through in close repetitions while applying adequate pressure at all times until you’re flush against what needs to be removed.
You’ll also want to keep in mind that this process is more suited towards steel blades than wood ones since they have much higher resistance levels which make them better suited for getting rid of these types of things.
7) Disconnect The Blade.
When you’re done, detach the blade from its handle by making a twisting motion.
If there’s anything left on it that could cause an issue, such as grease or paint, then use a rag to wipe this off and clean up any debris before storing your saw in some sort of protective sheath or container.
This will allow for easier handling when it comes time to resheathing it again later down the line so if you can’t find one, get creative!
8) Place The Blade Back Onto The Frame.
This process is nearly the same as taking it off, except this time you need to make sure that both sides of the blade are aligned with each other and then screw them back in at an angle.
When this is done, turn on your saw again and use a metal file or abrasive strip material to get rid of any rough edges that might have been created during either of those two steps.
If there’s still anything left over after doing this step correctly then feel free to go ahead and clean up using another rag before continuing onto something else!
Quick Safety Tips When Using Saws
Make sure the blade is aligned to make these two steps go by quicker.
Be careful when removing or putting on blades that you don’t cut yourself in any way, shape, or form!
If you’re just using a coping saw for light-duty work or as an emergency tool then cutting through materials such as metal can often lead to sparks and eventual fire which could be hazardous to your safety if not handled with care.
This is why I always recommend making quick cuts and keeping away from prolonged use of this type of power saw.
FAQs
Is It Hard To Use A Coping Saw?
No, it’s not hard to use a coping saw.
This is primarily due to the fact that they’re designed with light-duty or emergency purposes in mind.
As such, you won’t need too much skill when using one as long as you have a good grip on the handle and blade alignment is accurate.
Does The Coping Saw Cut When You Push Or Pull?
The coping saw will cut when you push the blade through the material.
How Do You Use The Coping Saw This Old House?
The coping saw in an old house is used to make a quick cut through wood, plastic, or any other material that’s been shaped with the help of a jigsaw.
How Tight Should A Coping Saw Be?
The screws on the coping saw should be tight enough to keep it in place, but not so tight that they cause resistance.
You can make them tighter or looser depending upon your preference and needs at the time.
Can A Coping Saw Cut Hardwood?
Although you won’t get a very clean cut with the coping saw, it will work if you need to make an emergency repair on some hardwood.
The blade is thinner and narrower than that of a table saw so your cuts may not be as precise or deep.
It’s also important to remember that wood can pop out from under the blade when cutting into hardwoods like oak because of how fibrous they are, which could lead to damaging the material.
Final Verdict
in conclusion, a coping saw is an affordable and versatile tool to have on hand for quick, last-minute projects.