
Taper cuts are an important part of the woodworking process. They help to make a piece fit together with another and look more professional.
There are three ways that you can cut tapers on your table saw, but they all require different methods of setup in order for them to work correctly.
We will be discussing these three methods as well as how they differ from one another so that you will know which one is best for your project!
Table of Contents
6 Easy Ways To Cut a Taper on a Table Saw
1) Installing the blade protector
A taper cut can be made in two ways. The first is with the blade cutting across the wood, and the second has the blade tilted to make a long stroke along with it.
In order for this to work on your table saw you will need to install either of these tools:
Blade Protector: This attaches directly onto your blades so that they are protected when not in use.
They come with different settings depending on what type of cuts you typically do during projects, but if you don’t have one already then we recommend using a 90-degree set as those are most common for people who want to create tapers or bevels on their table saw.
Aligner Tool: If instead you plan on making angled cuts or bevels then you’ll need the aligner tool.
This accessory allows for tilting your blade to the left or right to create different types of angles, and it’s a must-have if that is what you plan on doing with your taper cut.
We recommend using an Aligner Tool when creating angled cuts or bevels because they require less effort than adjusting the blade protector every single time, but either one will work just fine for this type of task.
2) Using push stick
The push stick is a lot easier to use than the Aligner Tool. It allows for quick and easy taper cuts because you no longer have to make adjustments, but it does take away some of your control over where the cut starts from which might not be ideal if precision is important in this particular task.
However, since you are using a push stick then there’s one less accessory that will need adjusting when making angled or beveled cuts so that makes up for any lack-of-control issues with the tool itself.
It’s also worth mentioning here that either type of tapering would work just fine on an end grain board because those types of projects require more effort in order to keep every single piece aligned correctly.
3) Line up the cut on the finished side of the part.
this can be done by laying the part on a workbench or putting it in front of you and using your dominant hand to trace where the cut would go.
the most important thing is that both hands are completely open because we’ll be cutting with our other arm which will make precision much more difficult if one of those two arms isn’t free at all times.
we also want to keep everything as square as possible so first, measure from corner to corner along the top edge: this should give us the width for how far up and down we can move before starting to taper off.
Next, use these measurements when drawing lines on each side in order to have them intersecting neatly without any gaps between their edges (keep in mind that the bottom of our cutting line should be the same width as what we’ve measured).
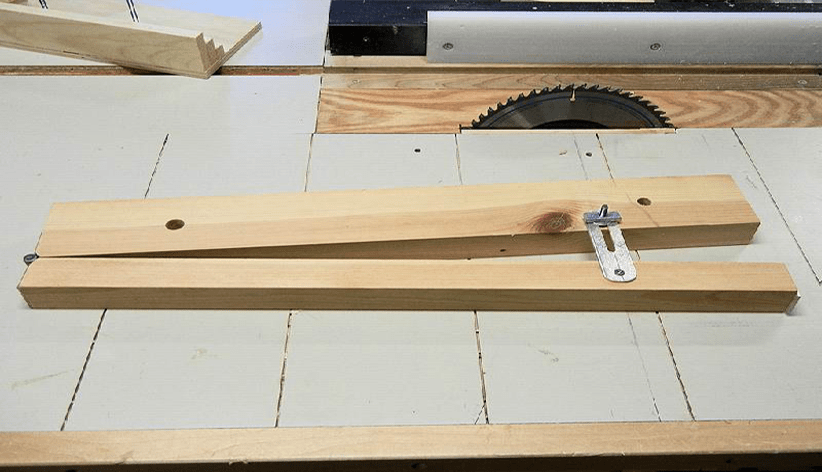
4) Create a board to guide the wood on the saw.
Attach the guide board to one of the straight edges, typically on the end. This will help keep our saw blade in alignment with where we want it to cut down on one end and upon the other.
The guide is also helpful because if we’re not cutting at an exact 90-degree angle (which is hard to do), this can help us make sure that both sides are parallel as well.
And finally, when taping off uneven edges, you’ll need some type of support for your piece otherwise there’s no way it won’t wobble around while you’re trying to measure which line goes first or last.
5) Select the desired taper angle and set the fence
Set your fence to the size you need to cut. For a taper, it’s usually better not to use anything wider than 60 inches.
If we’re only using one side of our blade (the edge) and want an even depth on all sides then set your blade height at whatever measurement from the top surface of your board is going up to meet that angled line or point you drew.
If we are cutting with both edges of our saw blade then set it just about halfway between those two points.
this will give us more support for that first angled cut as well as provide equal amounts of material across each end after making successive cuts with any other angles.
6) Cut the parts
For this method, you’ll need to use a piece of plywood that is wider than your board and long enough to cover the entire length.
Cut it so there’s an overhang on both sides which will allow you to slide beneath as shown below.
Position your saw blade directly in line with one side of our material (in this case, edge A) by lining up the edge perpendicular to that first point we determined earlier.
In order for our cuts to be even all around, make sure that every time we lower the blade down onto our wood it goes back into position at its previous height before making a cut otherwise, some pieces may end up thicker or thinner than others when set against each other later on.
Safety Tips
- To avoid getting hurt, always wear gloves and eye protection.
- Always use a push stick on the board to help guide your cuts rather than relying solely on the saw blade for accuracy.
- If you’re cutting something long, make sure there is someone else nearby who can stop it from jumping off of your table should it get too close. Otherwise, they may need to run around picking up whatever pieces have fallen off while you continue making more accurate cuts if possible.
FAQs
What is a taper?
A tapered cut on a table saw enables us to make an angled or slanted cut through wood.
How do you know where the angle of your blade should be for the desired result?
The first step in making any cuts with a table saw involves marking out our lines and using those marks as guides when we’re cutting later.
We can tell whether we’ll need to raise or lower our blade by looking at how far away from the line it will hit, and then adjust accordingly so that it touches only what needs to be kept intact. With this information available, determining angles becomes easier!
How deep does one need to go into the board before making these cuts?
This is up to the individual and what they need! For example, if we’re cutting a piece of the lattice into strips for our window treatment, then it’s safe to go as deep as necessary.
What are some other uses for this technique?
There are many types of cuts that can be made on a table saw, there isn’t just one answer here!
Cutting pieces with intricate details in various materials like plywood and OSB (oriented strand board) typically requires an angled cut since these items don’t have much height or depth to them.
We may also use tapered cuts when making rabbets which are decorative designs where two boards butt together at right angles creating a square edge on either side.
Conclusion
Now that you know some of the ways to make a taper on a table saw, it’s time for you to go out and start practicing!