
A miter saw is a power tool used in carpentry to make angled cuts. It’s often the only way to cut trim at an angle, but not everyone has one of these expensive tools handy.
If you’re looking for a quick and easy way to cut trim that isn’t too big at 45 degree angles without any special equipment, here are ways that work great.
Table of Contents
How To Cut Trim At A 45 Degree Angle Without A Miter Saw
1. Measure The Length Of Trim You Need
Measure the length of trim you need. If you’re working with a long, skinny piece that needs to be cut at an angle or two pieces (such as for making picture frames), measure it from end to end and lay the straight edge on top so there’s one equal space between them where they meet at each endpoint. This will give you your measurement in inches.
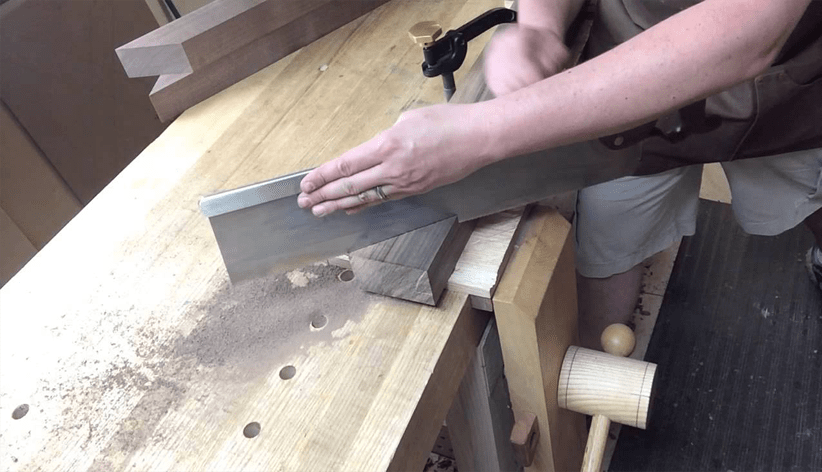
Cut across along the cutting line using either a miter saw, handsaw, circular saw (with wood blade), or jigsaw (for thick materials).
3. Cut A Piece Of Cardboard To That Size And Place It On Top Of Your Work Surface
the miter saw can be positioned at a 45 degree angle, while still having room for your hands to maneuver.
– use masking tape
– make sure blade meets workpiece on edge and is sharp
– cut along the marked line in one smooth motion
– if using a circular saw with a wood blade lower it so its blade meets the workpiece exactly on edge, use masking tape to mark the cutting line.
If you have trouble with this technique, make more than one pass, not along where you want to cut but next to it instead – then come back later after everything has cooled down (and will be less likely to shatter) for final trimming.
4. Draw A 45 Degree Angle Line With A Pencil Onto The Cardboard
-Place the blade of your saw on top of this line, with one edge touching it.
-Swing the miter saw back and forth along the 45 degree angle mark you just drew until all four sides are trimmed off.
-Repeat the process for other pieces of cardboard.
Since all angles are equal, you can mark with a pencil or just use your eye to get close in general before cutting.
5. Use Scissors Or An X-Acto Knife To Cut Along The Drawn Line, Then Use This Template For All Future Cuts
There are two things to keep in mind when you don’t have this type of equipment available: where you want to cut and how much material needs to be trimmed off the edge of the cardboard (or another surface).
The first step is marking your line with a pencil or by eye, then lay your blade on top of it, ensuring that they’re touching, and swing back down along the entire length until all four sides are trimmed off.
It doesn’t matter if the lines are straight because all angles will be equal once everything’s been chopped up. You can use scissors or an X-acto knife as well, though the knife will be more effective for longer lengths of trimming.
6. Place Your Trimmed Piece Against Another One At A Right Angle And Mark Where They Meet With Chalk
Draw a line along the top edge of each piece, so that it connects to the chalk mark where they meet. Holding your first blade at about 45 degrees in relation to what you’re cutting and use it like scissors or an X-acto knife (depending on which one you chose) and cut into both pieces until they are trimmed off evenly.
7. Remove Both Pieces From Each Other And Make Sure They Are Aligned Before Securing Them Together With Nails Or Screws
What You Need:
screwdriver and screws (or nails if using wood). These should be long enough to go through both pieces of trim but not so long that they stick out from either side when securing them together on one end.
If you have thinner wood than what is shown in the photo below then there are specialty screws available just for this type of project which can give better results with less visible hardware hanging over the edge of your joint.
FAQ
What Is The Best Type Of Trim For This Project?
The best type of trim for this project will depend on the material you are using, but in general, a good option is either wide crown molding or mitered baseboard.
How Do You Use A Circular Saw To Cut A 45 Degree Angle?
There are a few different ways to cut miter angles without using a miter saw. One way is to use the depth of your circular saw blade and the other method uses simple.
When Should You Use 45 Degree Angle Cuts?
It’s common for trim pieces such as crown molding or baseboard to be installed at an angle on walls, so this type of cutting technique can come in handy then! You will also need angled cuts if installing floorboards over hardwood floors as they often have much wider surfaces than traditional wood boards.
How Do I Get Straight Edges With My Table Saw?
To ensure that you have flat edges when making 45 degree cuts with your table saw, it may help to install some scrap material.
Can I Use Plywood Instead Of Solid Lumber Boards?
Yes, you can use plywood for this project instead of solid lumber boards.
TIP: Make sure to nail on the side that’s closer to the saw blade and pre-drill your holes so they fall at a 45 degree angle from one end of each board.
You want it to be as flat as possible when completing these steps or else your trim will warp outwards and not look good once completed.
It is really important to make sure everything is squared up before beginning with any assembly work because otherwise there won’t be enough room left over for everything to fit together properly.
If you’re using mitered crown molding then place all four corners against a straight edge such as an uncut piece of baseboard in order to make sure that the miter is aligned and square.
I Don’T Have A Miter Saw, Can I Still Do This Diy?
No worries, there are still plenty of ways to cut trim at a 45 degree angle.
The simplest and cheapest way is with the help of two handsaws or circular saws that can be held together as if they were one larger miter saw.
The trick here is being able to keep everything flat against each other while cutting so it’s important not only to pre-drill holes but also to make sure you’re using your own weight on top in order to cut through the boards evenly without them moving outwards too much.
If you don’t have any hand tools then check for a miter box that will guide your cuts, though this usually comes with its own set of challenges such as lack of support when making angled cuts and needing to be guided with a pencil.